


Dominando la forma de la sentadilla: tu guía para una técnica perfecta y segura
Por qué la forma de la sentadilla es más importante de lo que crees
Si hay un movimiento que aparece en casi todos los programas de fuerza, es la sentadilla. ¡Y con razón! Las sentadillas fortalecen las piernas, activan el core y se transfieren directamente a los movimientos que haces a diario, como cargar a tu hijo o subir escaleras. Pero aquí está el truco: una mala técnica de sentadilla puede ser más perjudicial que beneficiosa. Aprender el movimiento correcto de sentadilla te permite evitar lesiones y usar tu peso corporal para liberar tu fuerza. Vamos a ayudarte a hacer sentadillas con más fuerza, seguridad y confianza que nunca.
Cómo hacer una sentadilla
Aprender a hacer sentadillas correctamente no es complicado si lo explicas paso a paso. A continuación, te explicaremos exactamente cómo hacer una sentadilla basic para que puedas ganar fuerza con confianza y control.
Paso 1: Establece tu postura
Ponte en posición inicial con los pies separados a la anchura de los hombros, o un poco más, según tu complexión. Gira los dedos de los pies unos 15-30 grados, lo justo para que las rodillas se alineen correctamente con el movimiento. Esta posición permite que las caderas y las rodillas se muevan con naturalidad y sienta las bases para una sentadilla fuerte y estable.
Tu peso debe estar distribuido uniformemente sobre el mediopié, con los talones y los dedos bien plantados. Imagina que aprietas los pies en el suelo girándolos ligeramente hacia afuera (sin moverlos), lo que activará los glúteos y fijará la postura.
Paso 2: Fortalezca el centro del cuerpo y la parte superior de la espalda
Antes de contraer el core, respira hondo, dirigiéndolo hacia el abdomen (no hacia el pecho) y mantén la respiración. Esta presión intraabdominal actúa como un cinturón de lastre interno, protegiendo la columna vertebral. Luego, eleva el pecho, junta los omóplatos y mantén la espalda alta tensa.
Piensa en tu torso como una columna sólida para mantener la columna neutra de principio a fin. Tu cabeza debe permanecer alineada con la columna. Evita inclinar la cabeza para mirar al techo o al suelo.
Paso 3: Iniciar la sentadilla con una bisagra de cadera
Empuja las caderas ligeramente hacia atrás, como si estuvieras a punto de sentarte en una silla, para adoptar la posición de sentadilla. Esta "bisagra de cadera" carga primero los glúteos y los isquiotibiales, lo que genera equilibrio y control. Una vez que las caderas comiencen a moverse hacia atrás, permite que las rodillas se flexionen.
Este patrón de movimiento ayuda a prevenir el valgo de rodilla (que las rodillas se doblen hacia adentro) y desplaza la carga de trabajo a la cadena posterior, donde corresponde. Mantén el pecho erguido y la espalda recta al descender.
Paso 4: Descender con control
Sigue flexionando las rodillas y baja el cuerpo hasta la posición de sentadilla, manteniendo el pecho erguido y la columna neutra. Intenta agacharte hasta que las caderas queden justo debajo de las rodillas; esto se llama "romper la paralela". Bajar tanto te asegura trabajar todo el rango de movimiento y trabajar todos los grupos musculares principales de forma uniforme.
Si tienes flexibilidad, puedes dejar que las rodillas se desplacen ligeramente más allá de los dedos de los pies, siempre que estén alineadas con los pies y no se doblen hacia adentro. Mantén el peso sobre los talones y el mediopié, nunca sobre las puntas. No te apresures en esta parte: un movimiento lento y controlado te mantiene seguro y desarrolla mucha fuerza.
Paso 5: Mantener la columna neutra
Durante el descenso, la columna vertebral debe mantener su curvatura natural en S, sin curvarse ni arquearse excesivamente. Una espalda baja curvada ejerce presión sobre la columna, mientras que un arqueamiento excesivo puede causar inestabilidad bajo carga.
Aquí es donde fortalecer los músculos del torso da sus frutos. Mantén las costillas alineadas sobre la pelvis y la cabeza neutra: todo el torso debe sentirse como una sola unidad.
Paso 6: Alcanza tu profundidad ideal (y no más)
Al llegar abajo, haz una pausa. Con la postura correcta para la sentadilla, tus muslos deben estar paralelos al suelo o ligeramente más abajo, dependiendo de tu movilidad. Este es el punto ideal para la activación muscular y la salud articular.
Si tu espalda empieza a curvarse (glúteos) antes de alcanzar la posición paralela, detente cuando tu postura empiece a fallar. Mejorar la movilidad de tobillos y caderas con el tiempo te permitirá hacer sentadillas más profundas sin sacrificar la alineación.
Paso 7: Empuja los talones para ponerte de pie
Ahora es el momento de volver a subir. Empuja el suelo con los talones y el mediopié. Aprieta los glúteos con fuerza y extiende las caderas y las rodillas al mismo tiempo. Mantén las rodillas hacia afuera y el pecho erguido mientras regresas a la posición inicial.
No guíes el movimiento con las caderas ni dejes que el torso se incline hacia adelante; las caderas y los hombros deben subir juntos. Ponte de pie hasta que las caderas y las rodillas estén completamente extendidas. Esa es una repetición completa.
Paso 8: Reiniciar y prepararse para la siguiente repetición
Antes de empezar la siguiente repetición, vuelve a colocarte en la postura correcta, con los pies separados a la anchura de los hombros y los dedos ligeramente hacia afuera. Respira de nuevo, contrae el torso y revisa tu postura y la posición de la cabeza. Esta breve pausa entre repeticiones mantiene la técnica afinada y evita que la fatiga se agrave y te lleve a una técnica descuidada.
Paso 9: Respira con propósito
Respirar puede parecer automático, pero es fundamental al levantar pesas. Inhala profundamente antes de cada repetición y mantén la respiración durante el descenso. Exhala al volver a subir; esto ayuda a estabilizar la columna y a mantener el ritmo.
Consejo profesional: Piensa en la respiración como tu sistema de apoyo interno. Fortalece tu core, te mantiene conectado a tierra y hace que cada levantamiento se sienta más suave y fuerte.
Paso 10: Terminar con fuerza
Termina tu serie con la misma energía y control con la que empezaste. No te apresures en la última repetición ni dejes que la fatiga te impida mantener la postura correcta. Bloquea las caderas y las rodillas en la parte superior y regresa la barra con cuidado (si usas un soporte para sentadillas). Una vez de pie, tómate un momento para relajarte y respirar.
5 errores comunes al hacer sentadillas y cómo solucionarlos
Incluso los levantadores experimentados cometen errores al hacer sentadillas de vez en cuando, pero pequeños errores pueden convertirse en dolor y frustración más adelante. ¡Conoce los obstáculos antes de encontrarlos! A continuación, te presentamos cinco errores comunes al hacer sentadillas en el gimnasio, además de soluciones sencillas que puedes aplicar en el entrenamiento de hoy para mantener cada repetición con fuerza.
1. Levantamiento de talones
La elevación del talón se produce cuando los talones se despegan del suelo durante el descenso, desplazando el peso hacia los dedos. Este desplazamiento altera el equilibrio del mediopié, reduce la estabilidad y puede sobrecargar las rodillas y las espinillas. La causa más común es la movilidad limitada del tobillo. La rigidez en las pantorrillas y el tendón de Aquiles impide que la espinilla se mueva hacia adelante mientras mantiene el pie plano.
Cómo solucionarlo:
- Eleva los talones ahora y estíralos después. Coloca discos de 2,2 kg debajo de los talones o compra un calzado para sentadillas con tacón para mantener la postura correcta.
- Balanceo de tobillo de dos minutos. Antes de cada sesión, coloca un disco de pesas sobre la rodilla, realiza una zancada hacia adelante y empuja suavemente la rodilla más allá de los dedos del pie durante 10-15 repeticiones por lado. Esto mejora la flexión del tobillo para que el talón se mantenga pegado a largo plazo.
2. Rodillas hundidas
Las rodillas que se doblan hacia adentro durante la sentadilla, especialmente al ascender, comprometen la articulación y aumentan el riesgo de lesiones. Este problema común, conocido como valgo de rodilla, suele deberse a glúteos débiles y un control motor deficiente.
Cómo solucionarlo:
- Caminata monstruosa con minibanda. Coloca una banda ligera por encima de las rodillas y da 15 pasos amplios hacia adelante, hacia atrás y hacia los lados. Activarás los músculos de los glúteos, que mantienen las rodillas hacia afuera.
- "Separa el suelo". Piensa en separar el suelo del gimnasio con los pies al hacer la sentadilla. Esa señal mental alinea instantáneamente las rodillas con los dedos de los pies y refuerza una postura de sentadilla más segura.
- Espalda baja redondeada (“Butt-Wink”)
Al tocar fondo, la pelvis se hunde, convirtiendo la columna lumbar en un interrogante. Esto ocurre cuando buscas profundidad, tus caderas o isquiotibiales no lo soportan, o cuando la carga es simplemente demasiado pesada para mantener la columna neutra.
Al llegar al final de la sentadilla, la pelvis puede hundirse, lo que provoca que la zona lumbar se encorve. Esto ocurre cuando se realiza una sentadilla más profunda de la que las caderas o los isquiotibiales pueden soportar, o cuando la carga es simplemente demasiado pesada para mantener la columna neutra.
Cómo solucionarlo:
- Baja el peso. Aligera la barra hasta que puedas hacer sentadillas en paralelo sin flexionar el brazo.
- Aprieta más fuerte. Inhala, llena el abdomen 360° e imagina que alguien está a punto de golpearte en el estómago. Ese apoyo fija la columna vertebral.
- Mirada neutra, columna neutra. Mire al frente de modo que el cuello, la espalda media y la espalda baja estén alineados.
- Colapso del pecho
Inclinarse demasiado hacia adelante durante el ascenso puede provocar que la barra se desplace hacia adelante. La debilidad de los músculos de la espalda superior y una postura desenfocada suelen ser los responsables, y la pérdida de tensión en la espalda superior puede sobrecargar la espalda baja.
Cómo solucionarlo:
- Jalones faciales + elevaciones en W. Añade 3 series de 12-15 repeticiones al final de cada entrenamiento para fortalecer los deltoides posteriores y los trapecios medios.
- Sentadillas frontales con pausa. Coloque la barra en el soporte durante una sentadilla frontal con pausas de 3 segundos al final. La carga vertical enseña a la columna torácica a mantenerse erguida durante las sentadillas traseras pesadas.
5. Poca profundidad
Si te detienes 12,7 cm por encima del paralelo y lo das por bueno, no estás alcanzando la profundidad total donde el pliegue de la cadera desciende por debajo de la parte superior de las rodillas. Si bien las sentadillas parciales pueden ser útiles en algunos programas, hacer sentadillas superficiales de forma constante debido a la poca movilidad o las molestias limita el progreso y puede contribuir a una mala mecánica articular.
Cómo solucionarlo:
- Reduce la carga al peso corporal. Haz una sentadilla con todo el peso corporal, con las caderas por debajo de las rodillas y el torso firme, antes de volver a cargar.
- Guía de la pesa rusa. Sujeta una pesa rusa a la altura del pecho y siéntate entre los codos. La carga frontal contrarresta el cuerpo, haciendo que la profundidad total se sienta natural. Agrega peso gradualmente, manteniendo la posición inicial.
Variaciones de sentadillas que mantienen el entrenamiento fresco
No todas las sentadillas son iguales, y eso es bueno. Una vez que domines los basic de la técnica de sentadilla, añadir variedad es clave para mantener el reto, desarrollar una fuerza equilibrada y mantener tus entrenamientos frescos. Ya sea que entrenes en casa, en un gimnasio completo o simplemente quieras trabajar diferentes grupos musculares, existe una variante de sentadilla que te ayudará a adaptar el movimiento a tus objetivos.
Sentadillas en el aire y sentadillas con peso corporal
Las sentadillas en el aire (también conocidas como sentadillas con peso corporal) son la forma más efectiva de sentadilla y no requieren equipo. Siguen el mismo patrón de movimiento que una sentadilla estándar, pero sin carga externa. Al ser de bajo impacto y escalables, son perfectas para principiantes, calentamientos, enfriamientos o entrenamientos fuera del gimnasio.
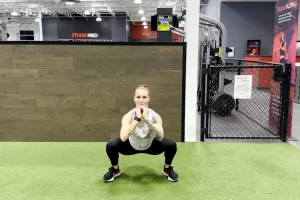
Para hacer una sentadilla en el aire, párate con los pies separados a la anchura de los hombros, los dedos de los pies ligeramente hacia afuera y los brazos al frente para mantener el equilibrio. Contrae el torso, empuja las caderas hacia atrás y baja hasta que los muslos queden paralelos o más bajos. Mantén el pecho elevado y el peso en los talones y el mediopié. Impulsa los talones para mantenerte erguido y repite.
Sentadillas con copa
Las sentadillas cáliz son una excelente progresión de las sentadillas en el aire y una herramienta práctica para aprender la forma correcta de las sentadillas. Sostener una mancuerna o pesa rusa a la altura del pecho promueve un torso erguido de forma natural, activa los músculos del core y te enseña a realizar una sentadilla profunda y controlada. El peso frontal contrarresta el cuerpo, facilitando la estabilidad y la alineación.
Sostén la pesa cerca del pecho con los codos apuntando hacia abajo. Ponte de pie con los pies separados a la anchura de los hombros, contrae el torso e inicia el movimiento empujando las caderas hacia atrás y flexionando las rodillas. Baja hasta que los codos queden entre las rodillas (o cerca de ellas) y luego apoya los talones para volver a la posición inicial. Esta variante es ideal tanto para principiantes como para levantadores experimentados, especialmente durante el calentamiento o las series de técnica.
Sentadillas frontales
Las sentadillas frontales desplazan la carga hacia la parte frontal del cuerpo, poniendo más énfasis en los cuádriceps y exigiendo un torso más erguido que una sentadilla trasera. Esta variante trabaja el core y requiere una postura firme durante todo el levantamiento, lo que la convierte en una excelente opción para atletas y quienes buscan mejorar el equilibrio y la postura.
Para realizar una sentadilla frontal, coloca la barra sobre los hombros con los codos elevados y los brazos paralelos al suelo. Ponte de pie, contrae el torso y realiza la sentadilla manteniendo los codos elevados y el pecho erguido. La espalda se mantiene más vertical que en una sentadilla trasera, lo que desplaza el esfuerzo a los cuádriceps.
Las sentadillas frontales son especialmente útiles para mejorar la técnica del clean & jerk o para abordar la tendencia a inclinarse hacia adelante en las sentadillas.
Sentadillas traseras
La sentadilla trasera es el modelo de referencia para el entrenamiento de fuerza y el desarrollo de potencia. La barra se apoya sobre la parte superior de la espalda (posición de barra alta) o más abajo, sobre los trapecios (posición de barra baja), según tu complexión y objetivos. En comparación con la sentadilla frontal, la sentadilla trasera trabaja más la cadena posterior, los glúteos, los isquiotibiales y los erectores espinales, gracias a un ángulo de torso más inclinado.
Coloca la barra sobre los trapecios o los deltoides posteriores, según el estilo de barra alta o baja. Sujétala justo por fuera de los hombros, contrae el torso y quítate del soporte con los pies separados a la anchura de las caderas y los hombros. Empuja las caderas hacia atrás, desciende hasta que rompas la paralela y luego sube presionando con los talones y apretando los glúteos.
Las sentadillas traseras son esenciales para desarrollar grupos musculares en toda la parte inferior del cuerpo y para progresar en programas basados en la fuerza.
Sentadillas en caja
Las sentadillas en cajón son una excelente manera de entrenar el control, reforzar la profundidad adecuada y eliminar el impulso al final del levantamiento. A diferencia de una sentadilla tradicional, te sientas sobre un cajón hasta la profundidad deseada (generalmente en paralelo o justo por debajo), haces una breve pausa y luego vuelves a subir. Esto te enseña a activar correctamente la cadera y fortalece los glúteos y los isquiotibiales.
Coloca una caja o banco resistente detrás de ti y párate frente a él con una postura ligeramente más abierta. Inicia la sentadilla empujando las caderas hacia atrás y sentándote sobre la caja; no te dejes caer ni pierdas la tensión. Mantén el pecho erguido y las rodillas alineadas con los dedos de los pies. Haz una pausa suave sobre la caja y luego impúlsate con los talones para levantarte. Las sentadillas sobre caja son especialmente útiles para principiantes, quienes trabajan la profundidad de las sentadillas o quienes entrenan la potencia explosiva.
Sentadillas parciales en alturas estratégicas
Las sentadillas parciales implican reducir el rango de movimiento y agacharse a una altura superior al paralelo, a propósito. Si bien no deberían reemplazar las sentadillas completas, las parciales son útiles para sobrecargar el extremo superior del levantamiento, concentrarse en puntos de estancamiento específicos o mantener la fuerza cuando la movilidad es limitada.
Para realizarlas, colócate como una sentadilla trasera estándar, pero coloca clavijas o usa una caja para detener el movimiento justo por encima del punto de estancamiento habitual. Haz una sentadilla a esa altura, haz una pausa si es necesario y vuelve a la posición inicial. Estas sentadillas se usan comúnmente en ciclos de fuerza o rehabilitación para desarrollar fuerza específica en las articulaciones, manteniendo la técnica correcta.
Sentadillas con barra sobre la cabeza
Las sentadillas con barra sobre la cabeza son una de las variantes más desafiantes y una verdadera prueba para la movilidad, el equilibrio y la estabilidad de todo el cuerpo. Sostener una barra sobre la cabeza con los brazos extendidos desafía el core, los hombros, las caderas y los tobillos a la vez. Es un ejercicio básico en el levantamiento olímpico y en la programación avanzada de CrossFit.
Comienza con un agarre amplio y empuja la barra por encima de la cabeza, bloqueando los codos. Mantén la barra alineada con el mediopié al hacer la sentadilla; esto requiere un torso erguido y mucha movilidad torácica. Empuja las caderas hacia atrás y baja hasta la posición de sentadilla, manteniendo la barra por encima de la cabeza y los brazos bloqueados. Si eres nuevo en esto, comienza con un tubo de PVC o una barra vacía para desarrollar la movilidad y la coordinación necesarias.
Sentadillas con pistola
Las sentadillas pistola son sentadillas con peso corporal a una sola pierna, donde una se mantiene extendida frente a ti mientras la otra hace todo el trabajo. Requieren fuerza, equilibrio, movilidad de tobillo y coordinación. Al no requerir equipo, son ideales para entrenar en casa o cuando no tienes acceso a un soporte para sentadillas.
Párate sobre una pierna, con la otra pierna extendida frente a ti. Mantén el pecho erguido y el torso contraído. Baja lentamente sobre la pierna de apoyo, manteniendo la otra pierna levantada. Intenta alcanzar la posición máxima sin desplomarte. Impulsa el talón para volver a la posición inicial. Los principiantes pueden usar una caja o una correa TRX como ayuda. Las sentadillas pistola son excelentes para mejorar los desequilibrios musculares y la fuerza unilateral de la pierna.
Consejos de seguridad para sentadillas: cómo evitar lesiones mientras se desarrolla fuerza
Ya sea que seas nuevo en sentadillas o trabajes con pesas pesadas, la forma adecuada de realizar sentadillas es esencial para proteger tus articulaciones, fortalecer los músculos correctos y evitar lesiones innecesarias.
1. Comience con sentadillas con peso corporal
Empezar de golpe con pesas pesadas sin dominar la técnica es una de las formas más rápidas de lesionarse. Sin carga externa, el cuerpo puede concentrarse por completo en aprender buenos patrones de movimiento, desarrollar el control muscular y mejorar la movilidad.
Si añades peso antes de aprender a hacer sentadillas correctamente, aumentas el riesgo de sufrir distensiones de espalda, dolor de rodilla y una técnica deficiente que será más difícil de corregir más adelante. Domina primero las sentadillas con peso corporal y luego pasa a variantes como las sentadillas goblet antes de empezar con pesas.
2. No fuerces la profundidad más allá de tu movilidad
Bajar demasiado antes de que el cuerpo esté listo puede provocar curvatura lumbar, tensión en las rodillas o pérdida de equilibrio. Esto suele ocurrir cuando los levantadores buscan la profundidad máxima sin suficiente movilidad en el tobillo, la cadera o la columna vertebral para mantener una columna neutra y una postura erguida.
Para mantenerte seguro, trabaja dentro de tu rango de movimiento actual, incluso si eso implica detenerte por encima del paralelo. Con el tiempo, a medida que mejores flexibilidad y fuerza, podrás hacer sentadillas más profundas gradualmente sin comprometer la técnica ni correr el riesgo de lesionarte.
3. Mantenga las rodillas alineadas con los dedos de los pies.
Cuando las rodillas se hunden hacia adentro (lo que se denomina valgo de rodilla), se ejerce una tensión anormal sobre la articulación y, con el tiempo, puede provocar lesiones graves. Esto suele ocurrir cuando los glúteos están poco activos o no se presta atención al seguimiento correcto de la rodilla.
Una solución sencilla: empuja las rodillas hacia afuera al descender y ascender. Las rodillas deben mantenerse alineadas con los dedos de los pies durante todo el movimiento. Añadir una banda de resistencia ligera justo por encima de las rodillas puede ayudar a desarrollar la consciencia y activar los músculos que previenen el colapso de las rodillas.
4. Controla cada repetición, no confíes en el impulso
Rebotar desde la parte inferior de la sentadilla puede parecer un movimiento de potencia, pero impone una fuerza excesiva sobre las rodillas y la columna vertebral, reduciendo el esfuerzo muscular. Este error suele deberse a repeticiones apresuradas o a usar un peso demasiado pesado.
En lugar de eso, controla todo el movimiento. Baja con intención, haz una pequeña pausa al llegar abajo y luego presiona con el mediopié y los talones para mantenerte erguido. Esto protege tus articulaciones, mejora la activación muscular y te ayuda a fortalecerte y ganar velocidad.
5. Mejorar la movilidad para mejorar la seguridad
La rigidez en los tobillos, las caderas o los músculos de la parte superior de la espalda puede obligar al cuerpo a compensar con una postura incorrecta. Con el tiempo, esto crea desequilibrios y aumenta el riesgo de sufrir distensiones o dolor articular.
Para evitarlo, incorpora ejercicios de movilidad regulares a tu rutina. Usa un rodillo de espuma para relajar los tejidos tensos y estirar las caderas, los tobillos y la columna torácica. Incluso 5 o 10 minutos antes de tu entrenamiento pueden marcar una gran diferencia en tu técnica de sentadillas y en la prevención de lesiones.
6. Utilice un Power Rack con pasadores de seguridad
Intentar maximizar la sentadilla trasera sin medidas de seguridad es una receta para el desastre. Si fallas un levantamiento y no hay dónde apoyar la barra, puedes sufrir una caída o una lesión grave de espalda.
Siempre haz sentadillas en un rack o jaula de potencia con pasadores de seguridad horizontales justo debajo de tu nivel mínimo de sentadilla. Si no puedes completar una repetición, puedes dejar caer la barra sobre los pasadores con seguridad y alejarte. Esta configuración es mucho más segura que usar una máquina Smith o hacer sentadillas sin protección.
7. Evite la máquina Smith para sentadillas pesadas
Aunque la máquina Smith puede parecer una opción segura gracias a sus rieles guiados, en realidad obliga al cuerpo a seguir una trayectoria fija que no se alinea con la mecánica natural de la sentadilla. Esto aumenta el riesgo de sufrir distensiones en las rodillas y la zona lumbar, especialmente bajo carga.
En su lugar, usa pesas libres y un soporte para sentadillas. Permiten patrones de movimiento naturales y ejercitan los músculos estabilizadores, lo que no solo reduce el riesgo de lesiones, sino que también desarrolla más fuerza en el ejercicio real.
8. Adopte una postura cómoda que se adapte a su complexión.
Forzar los pies a una posición ideal que no se adapta a la estructura ni la flexibilidad de la cadera puede alterar la postura y causar dolor articular. La postura ideal para hacer sentadillas varía ligeramente según la persona.
Comienza con los pies ligeramente más separados que las caderas y los dedos ligeramente hacia afuera, y luego experimenta hasta encontrar la posición más firme y equilibrada. Las rodillas deben quedar sobre los dedos de los pies y las caderas deben sentirse móviles durante el descenso.
9. Deténgase si siente un dolor agudo o persistente
Hay una gran diferencia entre la fatiga muscular y el dolor articular. Un dolor agudo, punzante o persistente, especialmente en las rodillas, la cadera o la espalda, es una señal de alerta de que algo anda mal con tu técnica o programación.
Escucha a tu cuerpo. Si notas algo extraño, detén la serie inmediatamente y reevalúa. Considera grabar tu postura, reducir el peso o consultar con un entrenador personal para asegurarte de que te mueves con seguridad.
10. Filma tu sentadilla o pídele a un profesional que revise tu forma
A veces, lo que parece "correcto" en realidad no lo es. Puede que no notes si tus rodillas ceden o tu pecho se hunde hasta que lo veas en video.
Para asegurarte de que haces sentadillas de forma segura, graba tu serie de lado y en un ángulo de 45 grados. Comprueba que tu columna se mantiene neutra, que las rodillas siguen la dirección de los dedos de los pies y que la profundidad es constante. Mejor aún, pide a un entrenador cualificado que te dé retroalimentación directa y te ayude a afianzar una técnica segura y firme. En VASA Fitness, puedes acceder a sesiones individuales o semiprivadas. sesiones de entrenamiento con entrenadores personales para ayudarte con tus entrenamientos.
10 beneficios de las sentadillas
Las sentadillas te brindan fuerza que se nota en todas partes. Realizadas con la técnica correcta, este potente movimiento desarrolla músculo, protege las articulaciones, aumenta la quema de calorías y entrena tu cuerpo para moverse mejor.
Músculos de las piernas más fuertes
Cada repetición de sentadilla activa los cuádriceps, isquiotibiales y glúteos, que son algunos de los músculos más importantes del cuerpo. Fortalecer estos músculos de las piernas puede facilitar las tareas cotidianas.
Huesos y articulaciones más densos
Las sentadillas aplican fuerza vertical que estimula las células que forman los huesos, aumentando la densidad en las caderas, la columna vertebral y las rodillas. Unos huesos y articulaciones más fuertes se traducen en menos fracturas, esguinces y dolores en el futuro.
Mayor quema de calorías
Dado que las sentadillas involucran varios grupos musculares principales a la vez, aumentan la frecuencia cardíaca y el gasto energético. Esto se traduce en una mayor quema de calorías durante la serie y en una mayor quema después de colocar la barra en el soporte debido a un metabolismo acelerado.
Estabilidad del núcleo para una columna vertebral sin dolor
Mantener la columna neutra bajo carga enseña a los abdominales, oblicuos y estabilizadores espinales profundos a trabajar como una unidad cohesiva. Un core más fuerte se traduce en menos dolor lumbar y mayor comodidad en el día a día.
Equilibrio y coordinación
Hacer una sentadilla profunda le enseña al cerebro a mapear la ubicación de cada extremidad en el espacio. Los músculos estabilizadores de tobillos, rodillas y caderas se activan para mantenerte erguido, agudizando la propiocepción. En la práctica, esto te da la fuerza para tropezar menos y moverte con más gracia dondequiera que vayas.
Flexibilidad en caderas y tobillos
Realizar sentadillas completas estira suavemente los flexores de la cadera, las pantorrillas y los tobillos en cada repetición. Con el tiempo, ese rango de movimiento controlado amplía la movilidad, haciendo que las zancadas, las estocadas e incluso sentarse con las piernas cruzadas en el suelo resulten más fáciles.
Resistencia a las lesiones
La fuerza equilibrada alrededor de la articulación de la rodilla y una cadena posterior reforzada actúan como una armadura corporal. Unos músculos fuertes absorben la fuerza que, de otro modo, tensionaría los ligamentos y tendones, lo que reduce el riesgo de sufrir desde desgarros del ligamento cruzado anterior (LCA) hasta dolor de rodilla o molestias en la zona lumbar.
Confianza dentro y fuera del gimnasio
Apilar discos adicionales y dominar la sentadilla a la perfección te da un impulso mental. Cada logro aumenta la confianza en ti mismo, lo que te da un impulso positivo para todo el día.
Terminar fuerte en VASA
Las sentadillas son una forma efectiva de fortalecer el cuerpo en general, con movimientos más equilibrados y una mayor confianza que podrás llevar a todos los aspectos de tu vida. Ya sea que estés trabajando en profundidad, aprendiendo a prepararte mejor o añadiendo nuevas variaciones a tu rutina, dominar la forma correcta de las sentadillas es una de las habilidades más gratificantes que puedes desarrollar en el gimnasio.
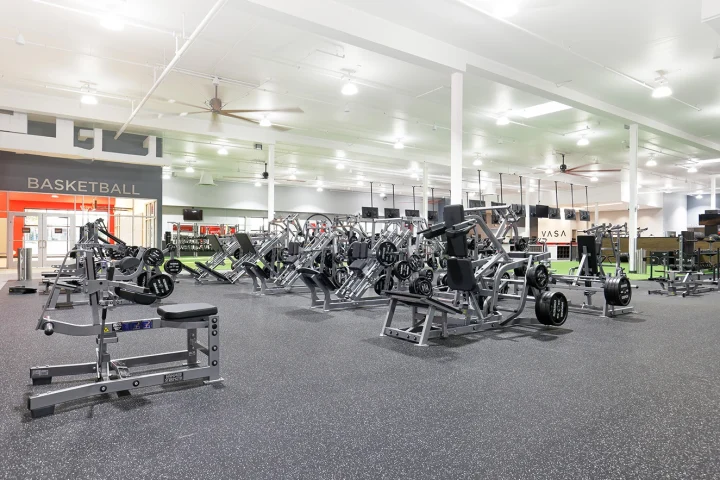
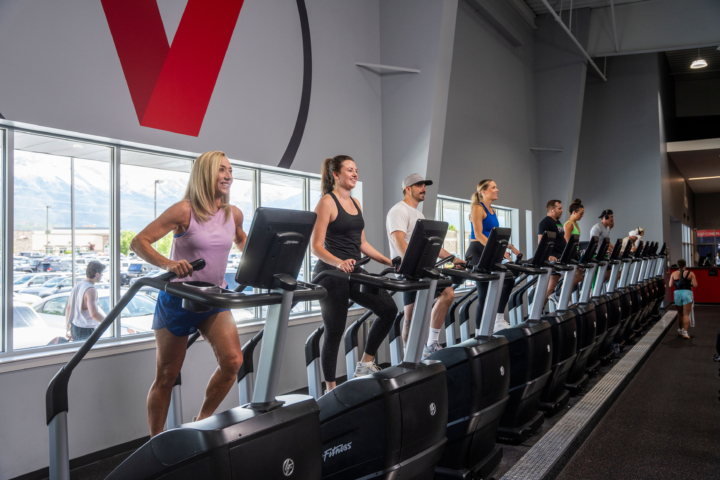
El camino requiere paciencia, práctica y apoyo, y eso es precisamente lo que encontrarás en VASA. Nuestros clubes están diseñados para ayudarte a moverte mejor y entrenar de forma más inteligente, con todo tipo de equipamiento, desde racks especiales para sentadillas hasta plataformas olímpicas, entrenadores personales certificados y salas de recuperación que te mantendrán fresco repetición tras repetición.
¿Listo para subir de nivel? Consigue uno Pase de prueba gratuito Y siente la diferencia que hacer sentadillas correctamente puede marcar en tu vida. ¡Únete hoy a VASA y levanta pesas con confianza!
Preguntas más frecuentes
¿Cuál es la forma correcta de hacer sentadillas?
Pies separados al ancho de hombros, dedos de los pies hacia afuera, apóyese, siéntese entre las caderas, mantenga la columna neutra, empuje con la parte media del pie y termine erguido.
¿Cómo puedo saber si estoy haciendo la sentadilla correctamente?
Una excelente manera de comprobar tu técnica es grabarla. También puedes trabajar con un entrenador personal para asegurarte de que estás haciendo sentadillas correctamente.
SUSCRÍBETE A NUESTRO BLOG
¡Introduce tu email para empezar a recibir nuestros emails del blog!